M1: HOW TO DRAW A CROISSANT
This module required us to measure a croissant and construct orthographic projections by hand. M1 was a good introduction to studying design as it taught me multiple skills. I learned how to set up my own photo stage, how to represent 3-dimensional objects using orthographic projections, appropriate drawing skills and conventions, and many more.

process
stage 1

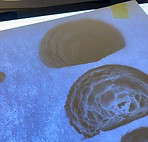
After setting up my own photo stage at home, I took multiple pictures. I had the chosen angle could represent the croissant as a 2-dimensional surface, while making sure that I captured the details of the croissant.
stage 2

After printing the first sheet, I placed it on a tracing pad and began tracing and hatching the elevations, plan and section cuts using different pencils and fineliners.
stage 3

I rotated the plan at 45 degree and traced it out. Then I added in my section drawings to start crafting the axonometric projection of the croissant.
reflection and modifications
Upon reflection, I learned that there are a few areas that I need to work on. In order to improve I need to add in more details to highlight the texture and the complexity of the surface of the croissant and make it look more realistic. For me to do this, I need to practice my sketching skills, learn to control the thickness of my sketching and use different techniques so I can show the crisp and jagged parts in addition to the smooth texture. In my opinion, the most significant part of the entire project was learning how to create an axonometric projection of the croissant. Since it was an abstract and unrealistic view of the croissant, visualizing how my croissant would look like from a 45 degree angle was tricky.
Following my tutor's feedback, I modified sheet 2, particularly the plan and the elevation drawings, in order to add that finer level of detail and texture to my croissant.
final submission for m1

Photographs of croissant

Orthographic drawings

Axonometric projection

Photographs of croissant